Installation
Note: Kakara is under active development and these steps could change at any point in time.
1) Downloading the Launcher
The first step is to download the Kakara Launcher. The Kakara Launcher is available for download here. A Windows and Linux version are available for download (A Mac version is not available currently). Download the version for your operating system. (The one with .exe is for Windows while the one with no file ending is for Linux.)
2) Running the Launcher for the First Time
After downloading the launcher, move it to the folder where you want Kakara to be. An example would be on the desktop in a folder named Kakara.
Now it is time to run the KLauncher for the first time so it can setup everything for you. The KLauncher will automatically download and setup all the files you need. The KLauncher will install the version of Java required (currently Java 11) and the latest version of the Jar files needed to run the game (engine.jar and client.jar).
Currently the KLauncher can only be ran with the command prompt. A GUI version will be available in the future. The following instructions are for how to run it on Windows and Linux:
For Windows, open that folder in the command prompt by doing the following: Open the command prompt by pressing the windows button and typing command prompt into the search bar and press enter. That will open the command prompt in your user directory. Type cd Desktop\Kakara (if the folder is on the desktop) to enter the Kakara folder. Then paste the following command into the prompt and press enter:
klauncher --game jenkins:master --engine jenkins:master --test_mode --working_dir test
If on Linux, navigate to the directory you have the klauncher stored in and run the same command:
./klauncher --game jenkins:master --engine jenkins:master --test_mode --working_dir test
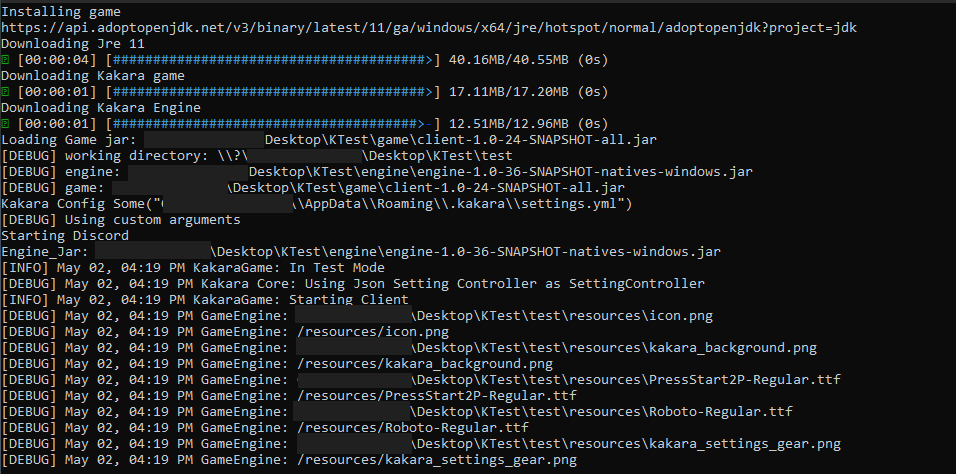
Running that command for the first time might take some time. You will see progress bars for downloading the information. (A slight pause when downloading the Jre 11 is normal, just let it continue.)
This is what the output of the command prompt should look like:

After you get to that point the Kakara window will open. Minimize it and return to the command prompt. Press Ctrl + C with the command prompt open. That will close the GUI and terminate the launcher. Now it is time for the next step.
3) Adding the KVanilla Mod
Now it is time to add the KVanilla mod. KVanilla has all the base content for the game, so without that mod, there is no game.
For now, KVanilla needs to be downloaded off its GitHub page (A GitHub account is required). Go here for the download. Click the first item you see in that table (with a green checkmark next to it). You will go to a new page with a section label Artifacts at the bottom of the page (you need to be logged in to see this section). Click on the item named kvanilla (it has a cube next to it). That will download a zip file containing the kvanilla jar files. We only need the one labeled kvanilla-1.0-SNAPSHOT.jar, you can ignore the others. Now open your Kakara folder. You want to navigate into the test folder and then enter test folder inside that folder. Inside that folder you will find a mods folder. Open it and put the kvanilla-1.0-SNAPSHOT.jar file in that folder.
4) Running the Game
After that you can now run the KLauncher again. You can use the same exact command as above to run the game in the command prompt. The game menu will open again. You can press the Singleplayer button to start the game. You can now play Kakara as you wish.
5) Closing Thoughts
Please keep in mind that Kakara is still in active development and bugs are common. You might need to use Ctrl + C on the console or use task manager to exit the game.
To update your game to the latest version, just simply run the launcher again using the command above. That will download the latest version of the game. You might also need to update the launcher, which you need to do by downloading the klauncher file again from the source above.
If you want to install additional mods, just put the mod’s jar file in the mods folder and run the game again. The mod should be installed.
These instructions will be updated in the future as the game’s development progresses.
